How to Install a Curbless Shower
The process of installing this curbless shower began when Symbi Homes poured the foundation for its 825 square-foot accessory dwelling unit.
Watch and listen to CEO Nicole Tysvaer outlining the process for this ADA-compliant bathroom, or read the transcript below.
Transcript:
We're nearing the finish line here at our ADU edition. I want to tell you a little bit about this wonderful shower that we did in our ADA-compliant bathroom.
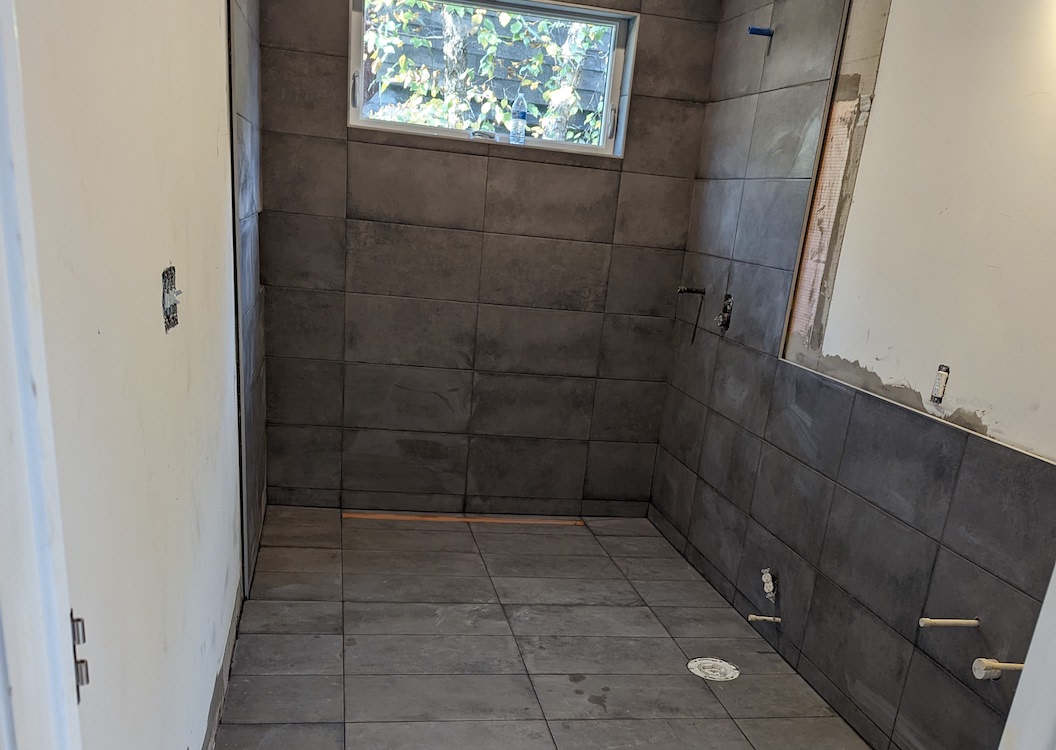
So building this curbless shower was a multi-step process and it began when we poured the slab. We recessed the slab three-quarters inch for the entire area of the shower. When it came time to put our mortar in, we had a nice slope.
We put the drain all the way at the back side, again, to help the water just flow in the right direction. We used the KERDI waterproofing system from Schluter, and we used their fully integrated linear drain.
We used their mat that goes on the floor on the walls, and we even waterproofed the area around the bathroom outside of the shower just to make sure that if any water escaped, it wasn't going to get underneath our molding and in between the walls.
We chose this nice textured tile that we could use throughout the floor and into the shower.